Are you curious about how Artificial Intelligence (AI) can enhance your Additive Manufacturing (AM) designs? In this video, we will explore 5 powerful ways to use General AI for AM Design that will help you optimize your design process and achieve better results.
From generating complex 3D lattice structures to adding stunning textures and patterns to your 3D prints, AI can take your AM designs to the next level. We will dive into practical examples and use cases for AI in 3D printing, including how to leverage AI algorithms to improve the performance of your designs and increase the efficiency of your workflow.
Whether you’re an experienced designer or new to the world of AM, this video will provide you with valuable insights and inspiration on how to incorporate AI into your design process. So sit back, grab your favorite 3D printing software, and get ready to discover the exciting possibilities of General AI for AM Design!
Designing for the Future: How General AI Can Enhance Your AM Process
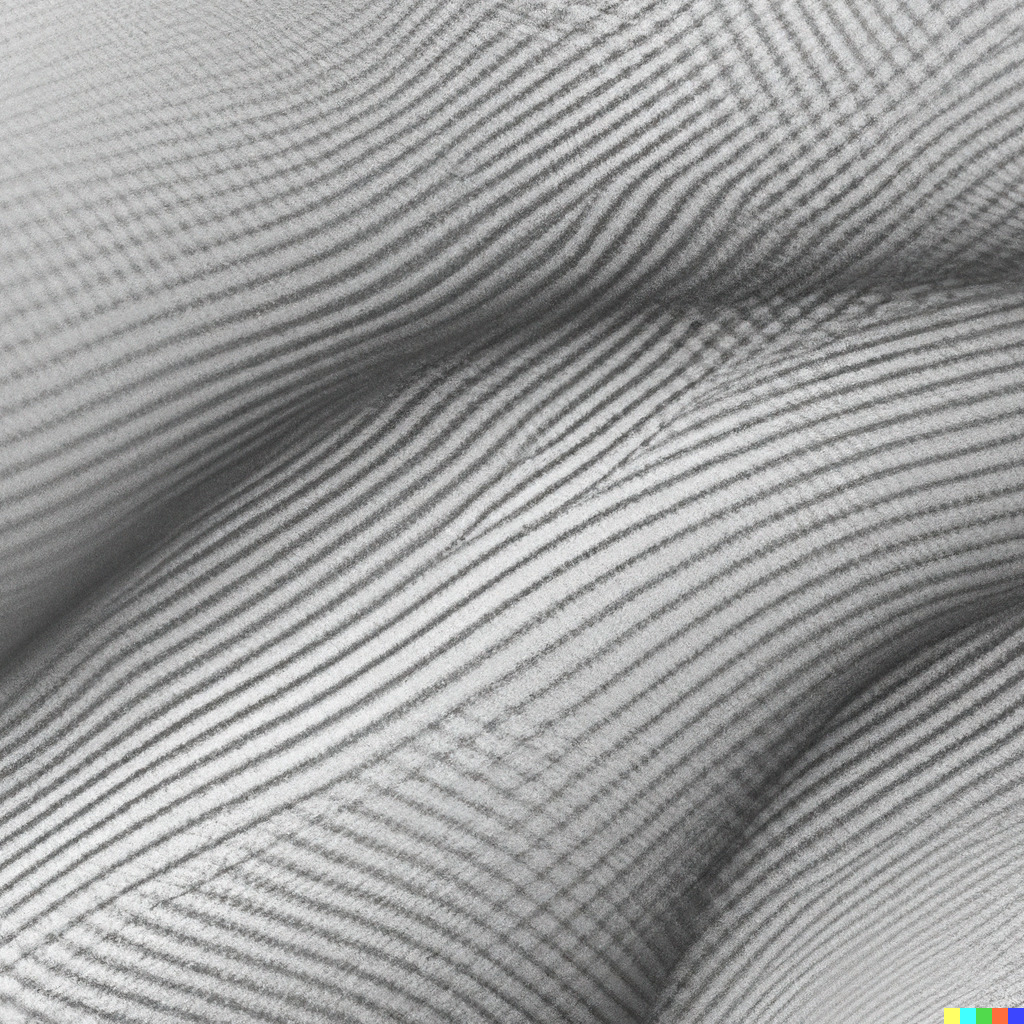
1. Use Image AI to Create Stunning Greyscale Textures for Your 3D Prints
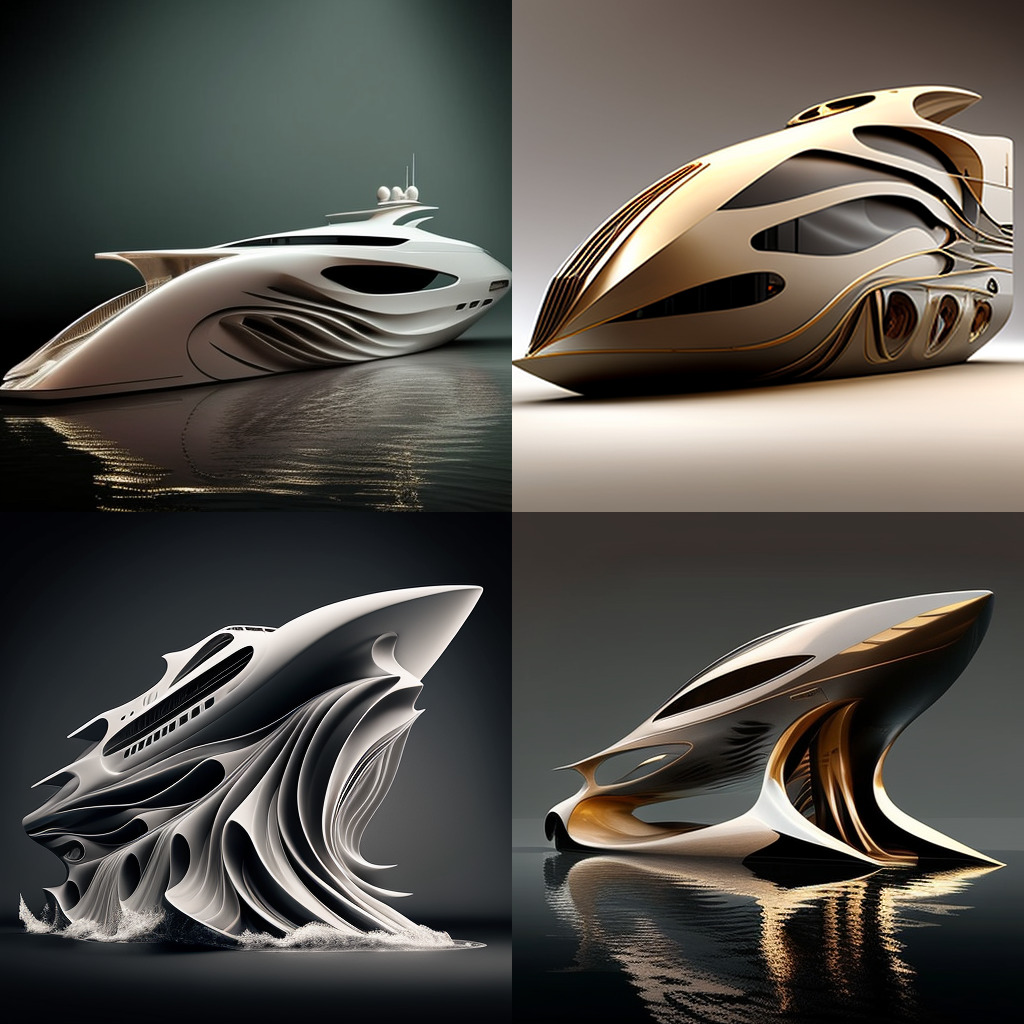
One of the most exciting applications of AI in 3D printing is the ability to create unique textures and patterns for your designs. With Image AI algorithms, you can generate stunning greyscale textures that can be applied to any mesh, giving your 3D prints a professional and artistic look.
By leveraging the power of Image AI, you can create intricate and complex textures that would be difficult or time-consuming to create manually. Simply input a reference image or choose from a library of pre-existing textures, and the AI will generate a greyscale map that you can use to apply the texture to your mesh.
The possibilities are endless, from adding organic patterns to your 3D prints to creating realistic textures like wood or stone. Whether you’re creating prototypes, decorative objects, or functional parts, using Image AI to create greyscale textures can help elevate your designs to the next level.
– Step 1: Choose a reference image Choose a reference image or sketch of the texture you want to create. This could be a photo, a drawing, or any other visual reference.
– Step 2: Write a prompt Write a prompt that describes the texture you want to create. This should include details on the type of texture, the style or aesthetic you’re aiming for, and any other relevant information. For example, if you want to create a wood-like texture, you might write a prompt like „Create a greyscale texture that resembles natural wood with a visible grain pattern.“
– Step 3: Input the prompt into DALL-E Open DALL-E in your web browser and input your prompt. You can choose to create a single texture or multiple variations of the texture.
– Step 4: Generate the texture Click on the „Generate“ button to create your greyscale texture. DALL-E will generate a 1024×1024 image of the texture, which you can download and use in your 3D printing software.
– Step 5: Apply the texture to your mesh Import the texture image into your 3D printing software and apply it to your mesh. Depending on the software you’re using, you may need to adjust the size, orientation, or other parameters of the texture to get the desired result.
Tips for writing a good prompt:
Be specific: Provide as much detail as possible about the texture you want to create, including any colors, shapes, or patterns.
Be concise: Keep your prompt short and to the point, focusing on the key features of the texture.
Be creative: Don’t be afraid to experiment with different prompts and see what kind of textures DALL-E can generate. You may discover new and unexpected results that inspire your design.
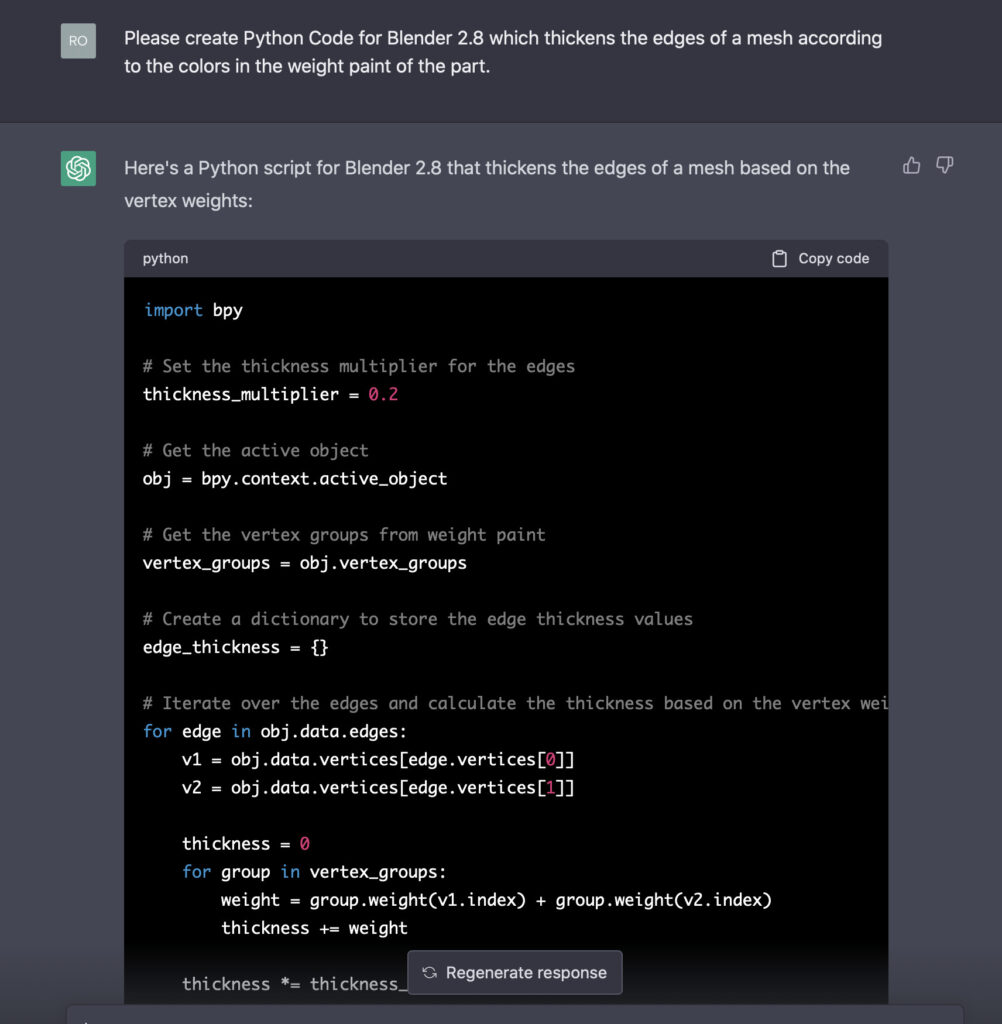
2. Use GPT-4 AI to Generate Blender and Grasshopper Code for Your 3D Designs
GPT-4 is the latest and most advanced natural language processing AI model, and it has the ability to generate complex code for 3D design software like Blender and Grasshopper. By harnessing the power of GPT-4, you can save time and streamline your design process by automating repetitive tasks and generating code for complex shapes and patterns.
Whether you’re designing for architecture, product design, or any other 3D printing application, using GPT-4 AI to generate code can help you achieve your design goals faster and more efficiently. In this tip, we’ll explore how to use GPT-4 to generate code for Blender and Grasshopper, so you can start incorporating AI into your 3D design workflow.
Step-by-Step Guide:
Step 1: Install the AI model
To use GPT-4 AI, you’ll need to install the model on your computer or use an online platform that supports it.
Step 2: Input your design specifications
Input the specifications of your design into GPT-4 AI, using natural language that describes the shape, size, and other relevant details of the design.
Step 3: Generate the code
Click on the „Generate Code“ button to generate the code for your design in Blender or Grasshopper.
Step 4: Review and refine the code
Review the generated code and make any necessary refinements or adjustments to ensure that it aligns with your design intent.
Step 5: Apply the code to your 3D model
Copy and paste the generated code into Blender or Grasshopper and apply it to your 3D model.
By using GPT-4 AI to generate code for Blender and Grasshopper, you can take advantage of the latest advances in AI technology and achieve greater efficiency and productivity in your 3D design workflow.
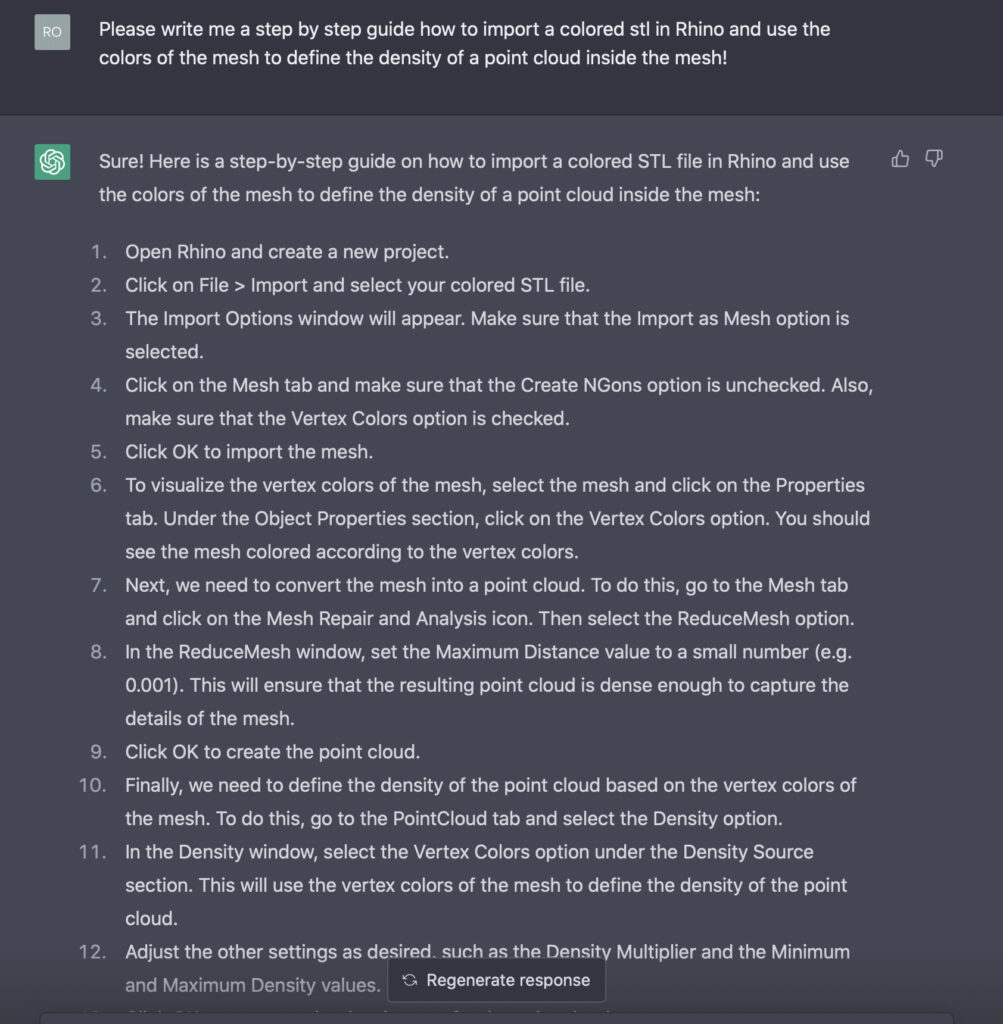
3. Ask AI for How-To Guides for Your 3D Design Software and Streamline Your Workflow
Asking AI for how-to guides for your 3D design software is a powerful way to streamline your workflow and improve your productivity. By leveraging the power of natural language processing and machine learning, you can get quick and accurate answers to your questions about 3D design software like Blender, Grasshopper, and more. In this tip, we’ll explore how to ask AI for how-to guides, so you can take advantage of this cutting-edge technology and optimize your 3D design workflow.
Step-by-Step Guide:
Step 1: Choose an AI platform
There are many AI platforms that offer natural language processing and machine learning capabilities, including OpenAI, GPT-3, and others. Choose a platform that aligns with your needs and budget.
Step 2: Write a prompt
Write a prompt that describes the task or question you have about your 3D design software. For example, „How do I create a smooth curve in Blender?“ or „What’s the best way to optimize my 3D print settings?“
Step 3: Input the prompt into the AI platform
Input your prompt into the AI platform and wait for the response. The AI will use natural language processing and machine learning to analyze your prompt and provide a helpful response.
Step 4: Review and apply the response
Review the response provided by the AI and apply it to your 3D design software. If necessary, refine your question and ask for additional guidance until you achieve your desired result.
Tips for prompt design:
Be specific: Provide as much detail as possible about the task or question you have. This will help the AI provide a more accurate and helpful response.
Be clear: Use clear and concise language in your prompt, avoiding jargon or technical terms that may confuse the AI.Be open-ended: Ask open-ended questions that allow for a variety of responses. This will help you discover new and innovative ways to approach your design tasks.
5. Use AI for User Research and Improve the User Experience of Your Additive Manufacturing Products
Understanding user needs and preferences is crucial for creating successful additive manufacturing products. With AI-powered user research tools, you can gather valuable insights into user behavior and expectations, identify pain points, and optimize your products for a better user experience. In this tip, we’ll explore how to use AI for user research and improve the user experience of your additive manufacturing products.
Step-by-Step Guide:
Step 1: Choose an AI-powered user research tool
There are several user research tools available, such as UserTesting, Usabilla, and more. Choose a tool that aligns with your needs and budget.
Step 2: Define your research goals and audience
Define your research goals and audience to ensure that you gather relevant and useful data. This can include aspects like user demographics, product usage scenarios, and more.
Step 3: Design your research prompts
Design your research prompts, such as surveys, questionnaires, or user tests, to gather data from your target audience. Make sure your prompts are clear and concise, and align with your research goals.
Step 4: Gather and analyze data
Gather data from your research prompts and use AI-powered analysis tools to identify patterns and insights. This can include aspects like user preferences, pain points, and suggestions for improvement.
Step 5: Optimize your additive manufacturing products
Use the insights from your user research to optimize your additive manufacturing products for a better user experience. This can include aspects like product design, features, and usability.
Tips for prompt design:
Keep it simple and clear: Make sure your research prompts are easy to understand and answer. Avoid using technical jargon or complicated questions.
Use open-ended questions: Use open-ended questions to gather detailed and meaningful responses from your target audience.
Test your prompts: Test your prompts with a small sample of users before launching a larger-scale research effort to ensure they are effective and useful.
Incorporating general AI into your additive manufacturing design process can yield significant benefits, from increased efficiency and productivity to enhanced user experience and satisfaction. These five tips are just the beginning – there are countless ways you can leverage AI to take your AM designs to the next level. Don’t be afraid to keep testing and exploring new techniques. And if you need further guidance, feel free to connect with me on LinkedIn. As an expert in SEO and copywriting for additive manufacturing design, I can help you unlock the full potential of AI and take your designs to new heights.
*this amazing 3D face model on the video cover was created by Abbadon-Abyss. Feel free to support the artist and purchase his model here.
Sign up to stay up to date about the newest tricks in
Design for Additive Manufacturing.
V
Schreibe einen Kommentar