In my article about „Creating 3D Textures for 3D Printing“, I explain a design approach to create 3D textures from black and white images. In this article I will show you an approach to create complex 3D textures with texture elements. I use dragon scales in this example. Using the Track To feature from Blender to freely orient and adjust the texture to the desired look.
Creating Complex 3D texture designs for Additive Manufacturing
Mesh, Element and Empty Object
To start you need a 3D mesh of the desired form. In this example it would be the shape of the dragon’s tail. I created it with a Bezier Curve and converted it to a mesh. To get a homogenous result, you need homogenous mesh faces, since we will place a texture element on each mesh face later on. But this is depending on the desired result. If you would like to create a random effect, you would need randomly arranged faces. The bezier curve approach gave me a great result and all faces are aligned and oriented in the same direction. To avoid problems use the make manifold and apply scale & rotation before proceeding.
To create the complex 3D texture, you need one texture element of your desired texture. While designing this, try to keep the resolution to a minimum, since you will duplicate it over a hundred times. Once you are done, place the object origin on the position where it should be placed on the face of the 3D mesh. Also mind, that the y-axis of the object will be aligned with the face normal. To avoid problems, use the make manifold and apply scale & rotation before proceeding also on the texture element.
The second element you need, to be able to smoothely adjust the angle of your texture, is an empty object. You could use any other object, but the cleanest and way is to use the standard empty object.
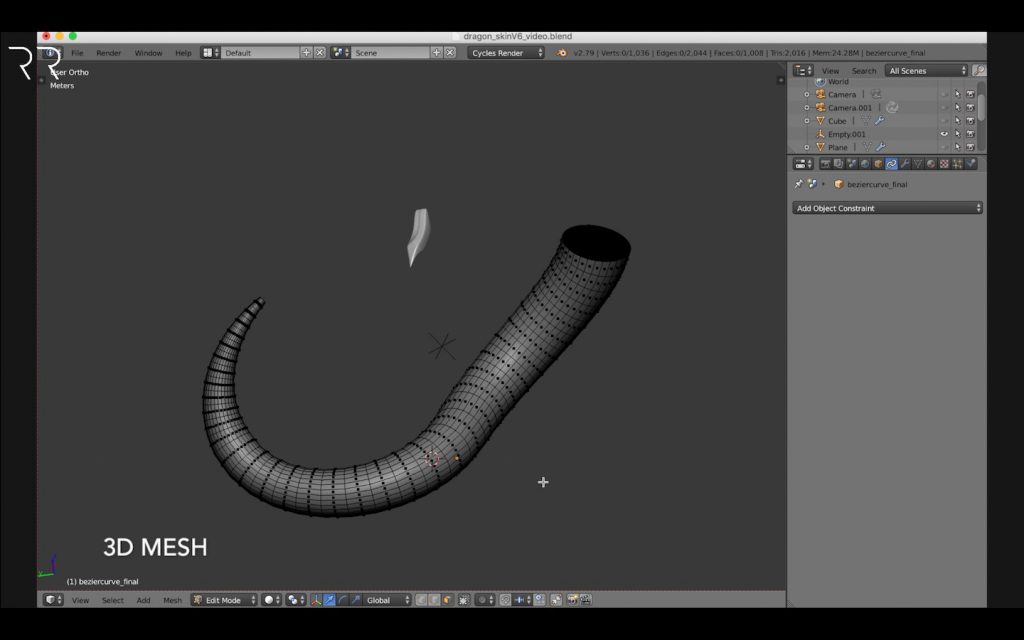
1. Track Empty with Texture Element
As already mentioned, you want the texture element to track the empty object. This way simply by moving the empty you are arranging all texture elements towards the desired point. You can do this by selecting the texture element, go to Object Constraints in the preference panel and select Track To, set the target to your empty object. Then you have to adapt the axis too.
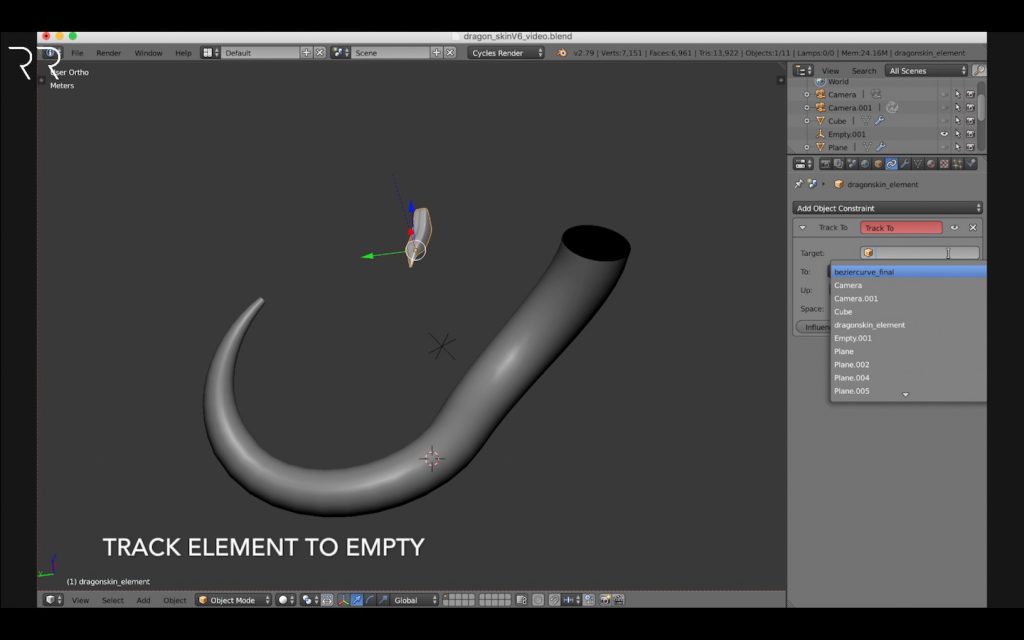
2. Set 3D Mesh as Parent Object
To create duplicates of the texture element you have to set the parent to the 3D mesh. Select the texture element and with holding TAB, select the 3D mesh. With CTRL-P you can Set Parent to Object.
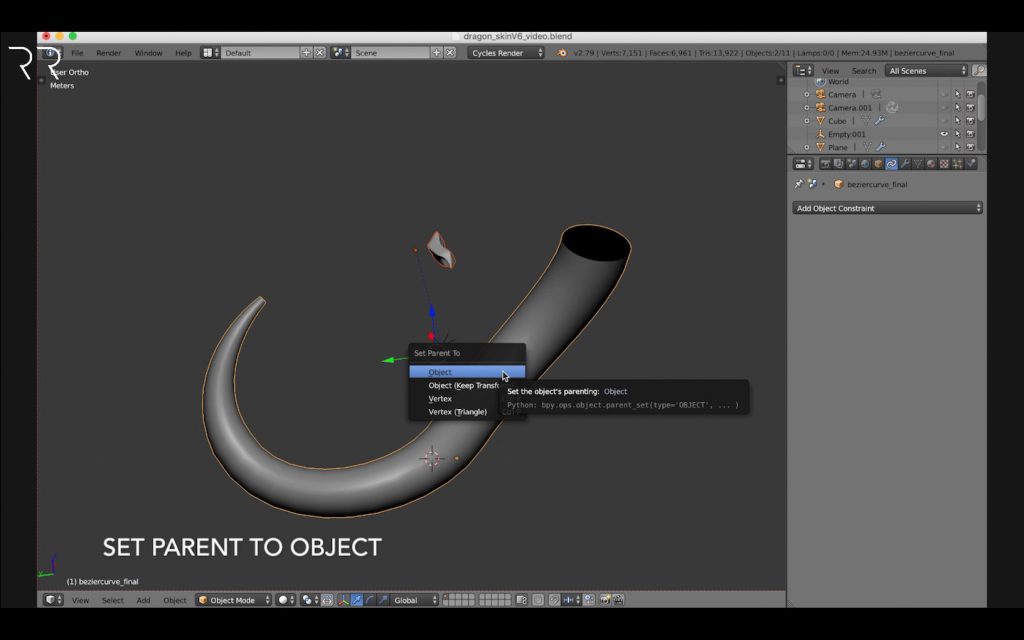
3. Duplicate Texture Scales on Faces
Now you only have to tell Blender, where to duplicate the child objects:
Select the 3D mesh, go to object in the properties panel and scroll down to Duplication. For this video I am using the duplicate on faces. You can also play around with the other settings to get different results.
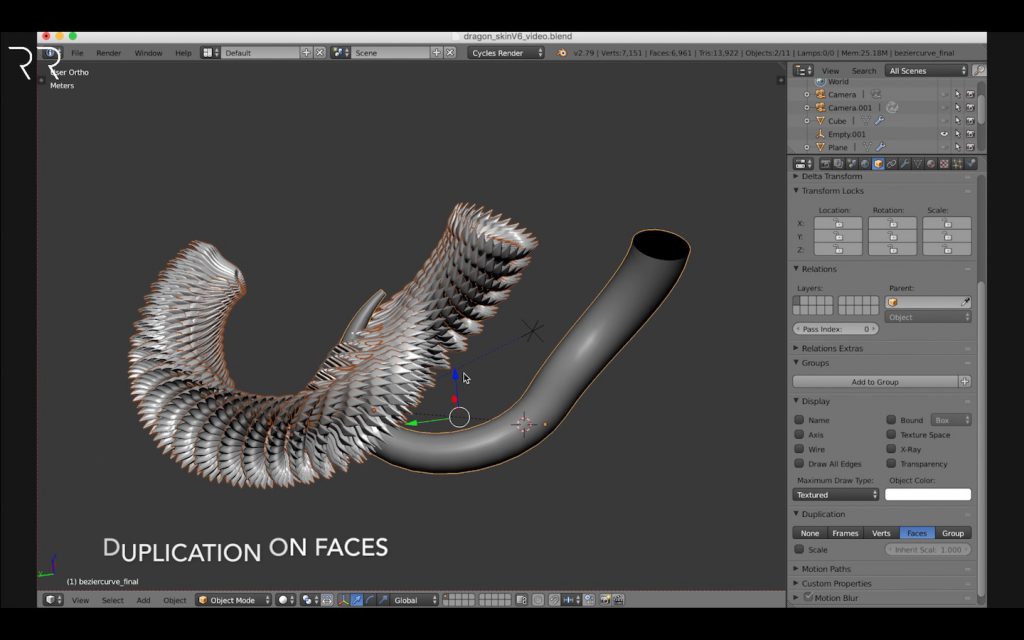
4. Adjust Texture Orientation
Once you selected Faces you will probably get a crazy result. To create a good result you have to change the position of the texture element and empty. Try different approaches moving the empty, changing the orientation of the texture element in Edit Mode, then apply rotation or change the axis of the tracking.
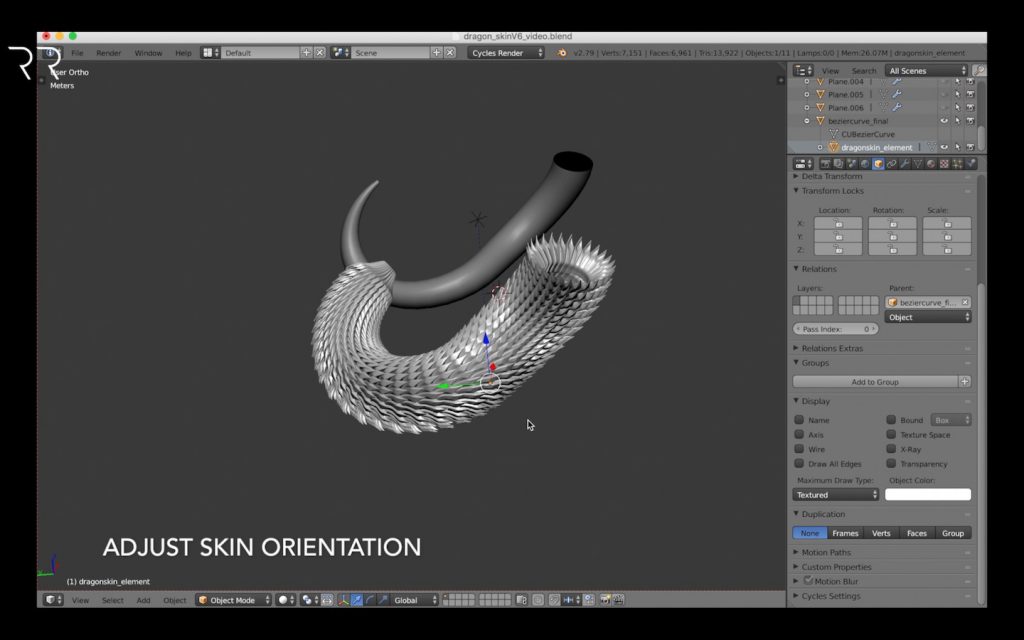
If you would like to change the thickness of your texture elements, select your original texture element, go into edit mode, select the complete mesh with „A“ and then scale the mesh thickness with „Alt-S“.
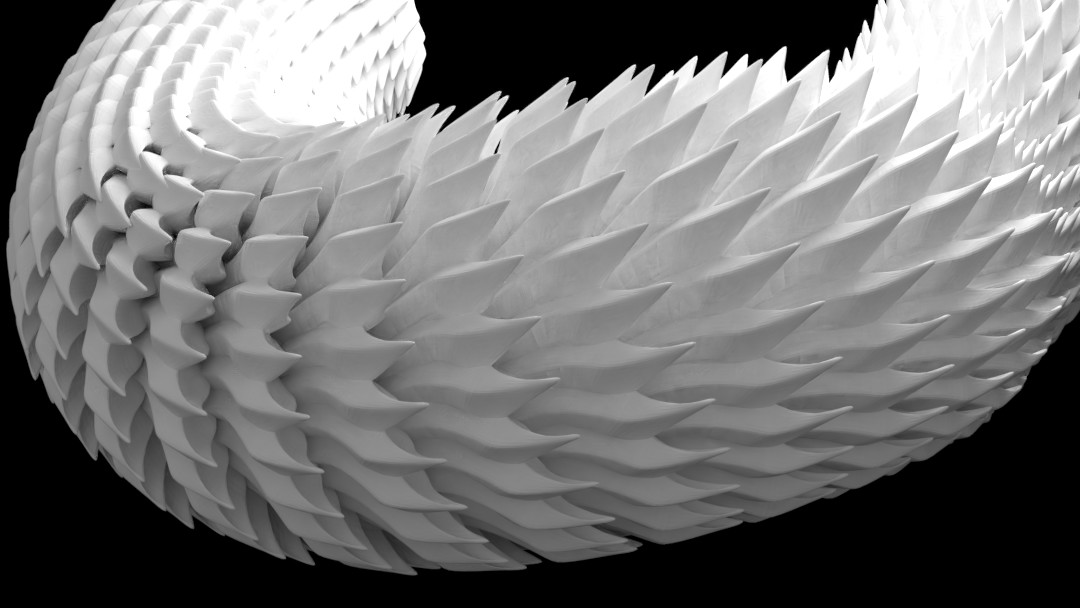
When your texture elements are oriented nicely, you can create real objects from your duplicates. If your chain design is consisting of a lot of elements, I suggest you save your file first. Then select the texture element duplicates and press „Shift-Ctrl-A“ this will separate all texture elements and create independent objects. Now you can delete separate elements.
However, if you go into edit mode, you will notice, that all of them are still using the same mesh data. In case you would like to edit that separately as well, select the texture element you would like to edit, click „U“ and Make Single User: Object & Data then you can edit the object mesh independently.
After you finished all your edits, you should delete the original texture element, to export the final STL design for Additive Manufacturing/ 3D Printing.
I hope this quick overview on how to create 3D lattice structures is helpful for you. Please feel free to comment or send me your creations and ask me any questions!
Sign up to stay up to date about the newest tricks in
Design for Additive Manufacturing.
V
Schreibe einen Kommentar