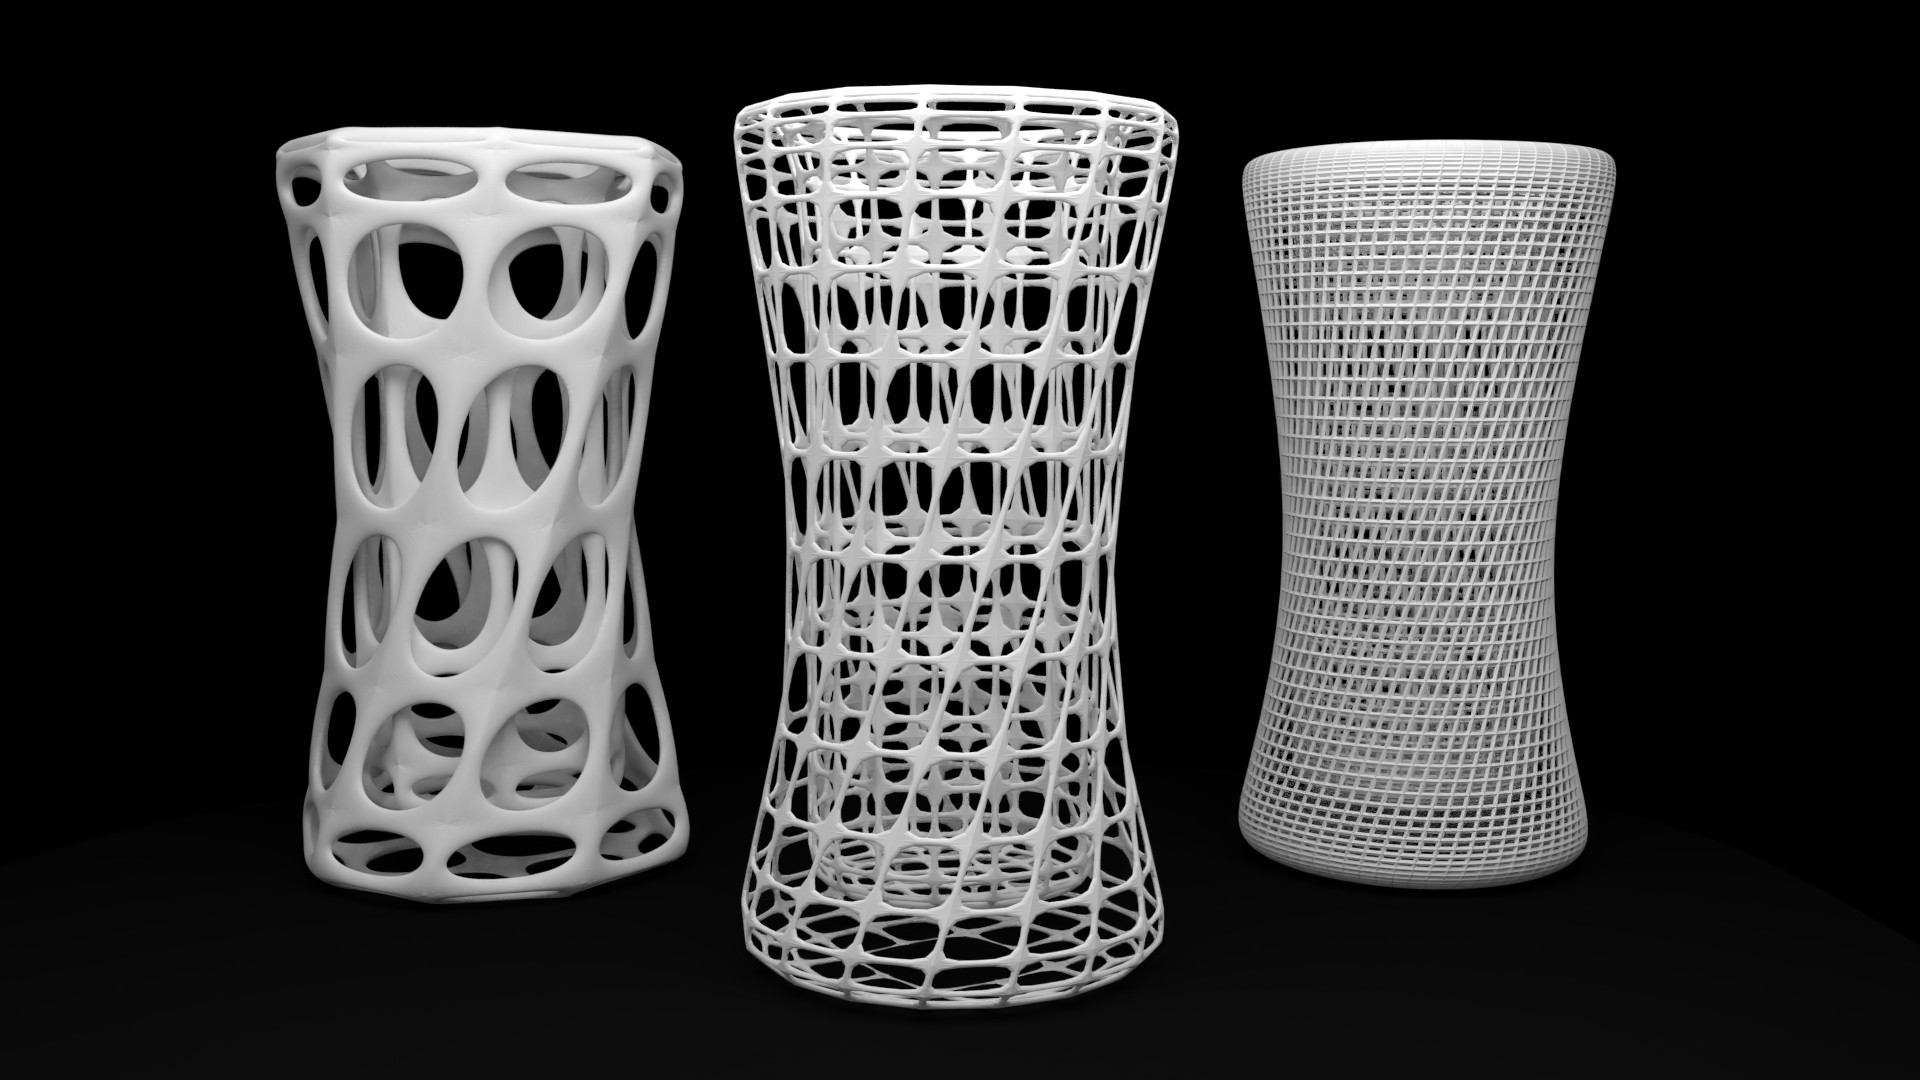
Creating Basic Lattice Structures with Blender 3D

Like I mentioned in my last post about Unlocking the full potential of Selective-Laser-Sintering“, lattice structures bring great advantages to 3D Printing/ Additive Manufacturing. They can be used to reduce weight, material costs and increase process stability and mechanical characteristics or simply to create appealing designs.

In this quick video I show how to create a basic lattice structure with the open source and free software Blender 3D. This way everybody can create lattice structures and tap the design freedom of 3D printing/ Additive Manufacturing.

Creating a basic lattice structure in under 1 minute

1. Create a Mesh

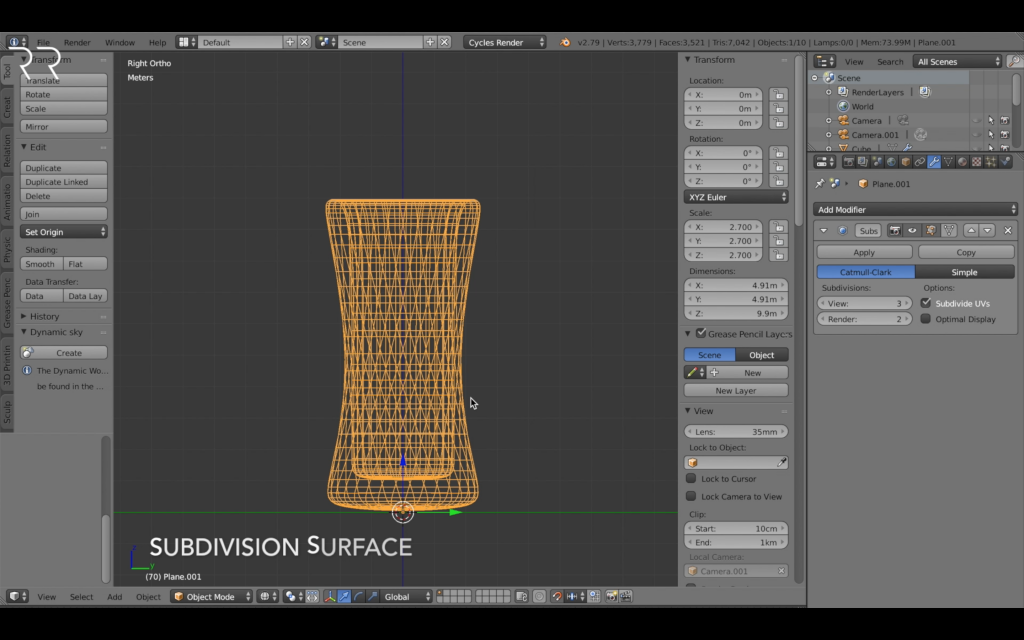
So first of all you need a mesh or an STL-file. If you created the mesh with blender you can adapt the mesh size with the Subdivision Surface Modifier or the Decimate Modifier for STL-files.

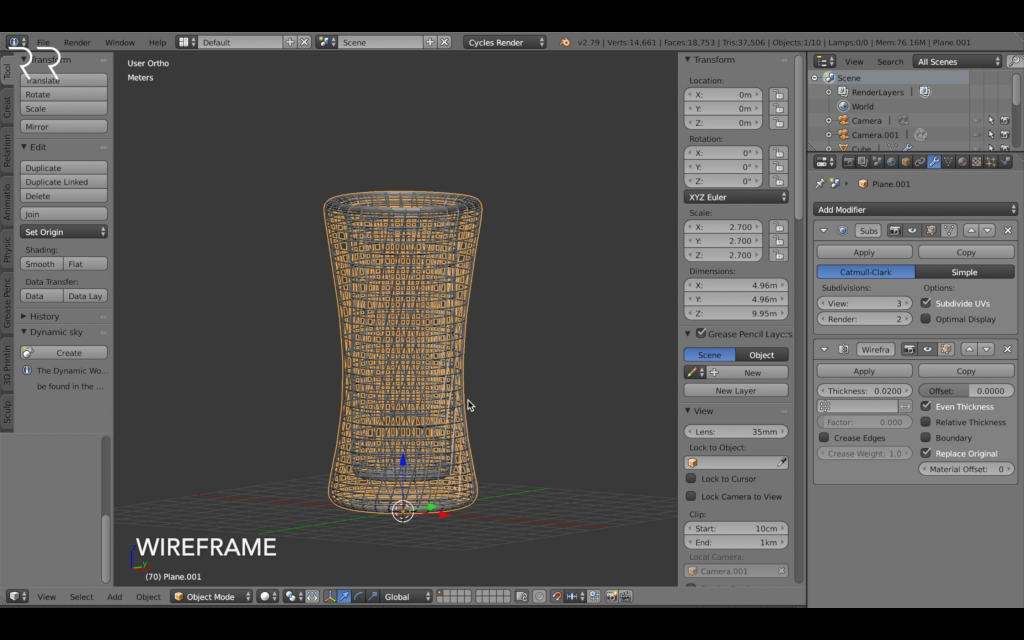
2. Use Wireframe Modifier

The Wireframe Modifier of Blender creates faces around the connecting edges of your mesh. Hence, editing your mesh, you directly edit your resolving lattice structures. You can define a vertex group to only use this modifier on a certain area.

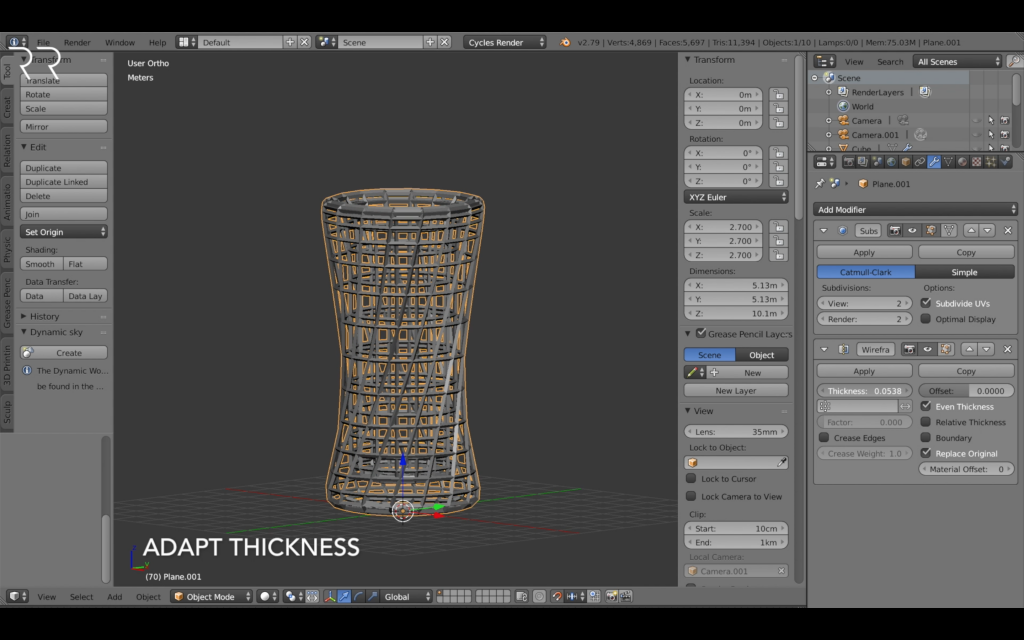
3. Adapt Lattice Thickness

In the Wireframe Modifier you can control the thickness of your lattice structure. Test even thickness, relative thickness and boundaries to create the best version for your mesh. In case you only want to create supporting structures on top of the original model, turn off the checkbox of „Replace Original„.

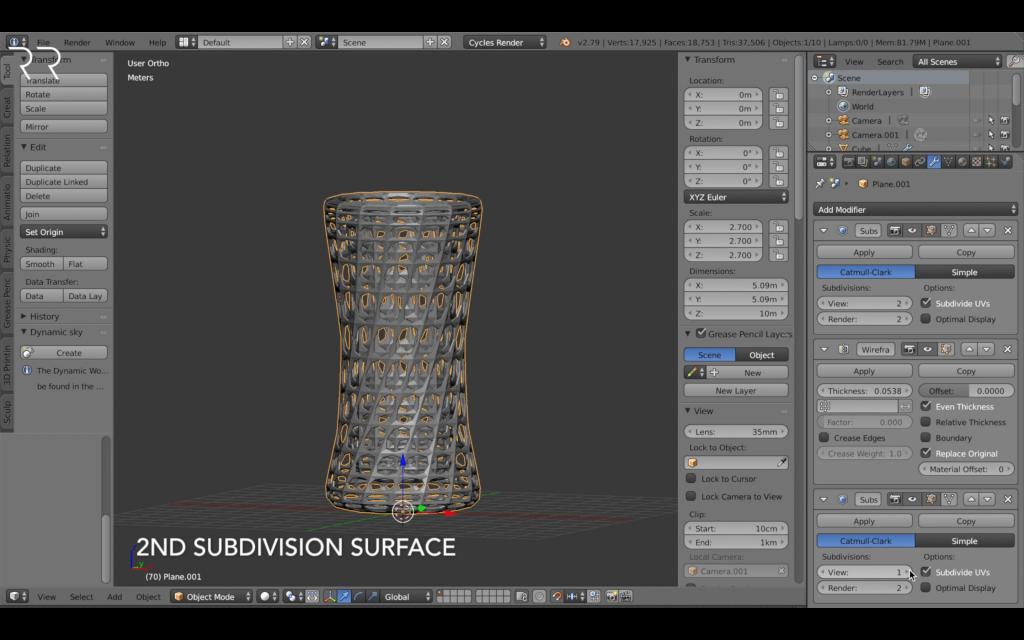
4. Create Smooth Lattice

To create a smoother lattice structure with transitions and thicker connections, you can add another subdivision surface modifier. This smoothes out the lattice structure and leaves you with a more organic design. You can control the form with the number of subdivisions in the second subdivision surface modifier as well as the crease edges tool reducing the crease weight.

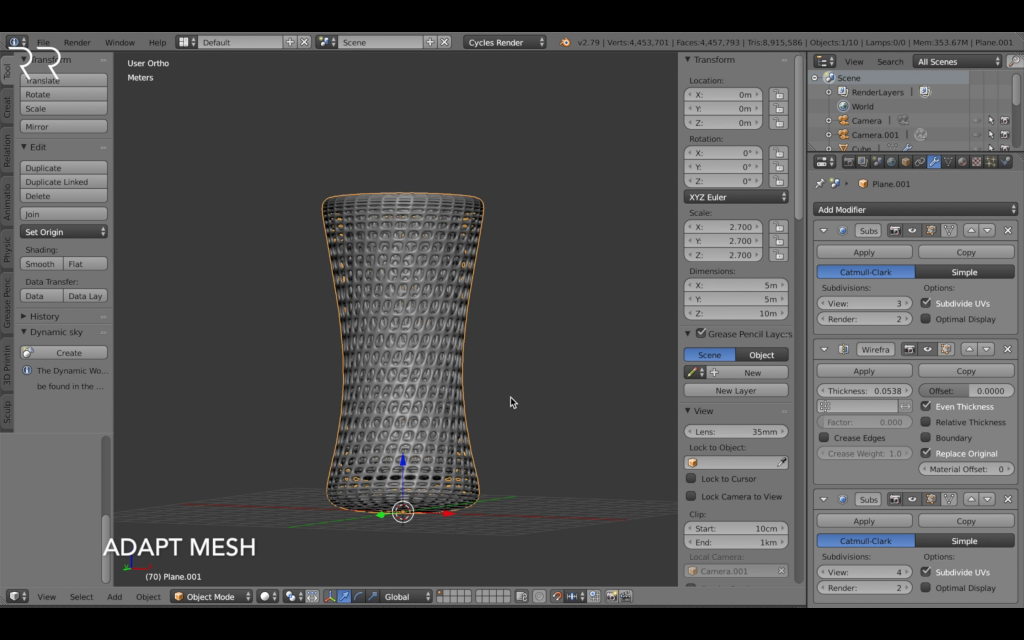
5. Adapt Mesh Size

By changing the subdivisions of the first subdivision surface modifier you can change the size of the mesh and therefore the resulting lattice structure. If your original model you can use the decimate modifier as well as the Remesh or Triangulate Modifier to change it.

When designing lattice structures for 3D printing, you should know which technology you will be using to produce your design. Different technologies have different requirements. Technologies like FDM and DMLS require a support structure below certain angles. Be aware which areas of your design are connected or lose and what this means for the production process as well as the resulting part stability. Be aware of the minimal thickness of the used technology and material and when exporting to a STL-file, always use a higher triangulation resolution than the used process. Your service provider or manufacturer can inform you about the required minimal resolution.

I hope this quick overview of the tools is helpful for you. Please feel free to comment and ask me any questions.

[ABTM id=2505]

Kommentare

Eine Antwort zu „Creating Basic Lattice Structures with Blender 3D“

  1. […] If you want to learn more about how to create the lattice structure using the Wireframe Modifier I explain it in more detail in the article „Creating Basic Lattice Structures with Blender 3d“ […]

Schreibe einen Kommentar

Deine E-Mail-Adresse wird nicht veröffentlicht. Erforderliche Felder sind mit * markiert

Diese Website verwendet Akismet, um Spam zu reduzieren. Erfahre mehr darüber, wie deine Kommentardaten verarbeitet werden.